STEP 1: Open your web browser and go to http://192.168.1.1
STEP 2: Enter the username and password (tmadmin/Adm@xxxx)
<Note: XXXX = last 4 digit of Mac Address>.
STEP 3: Click “Login” to log in to the Web page.
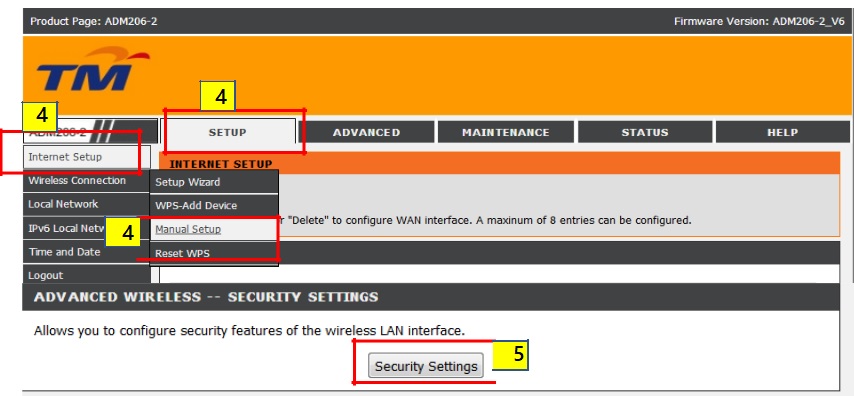
STEP 4: By default WPS is disabled. Go to the “Setup” button. Then select the “Internet Setup” and tick the “Manual Setup” to proceed security setting.

STEP 5: Click the “Security Setting” to configure security features of the Wireless LAN interface.
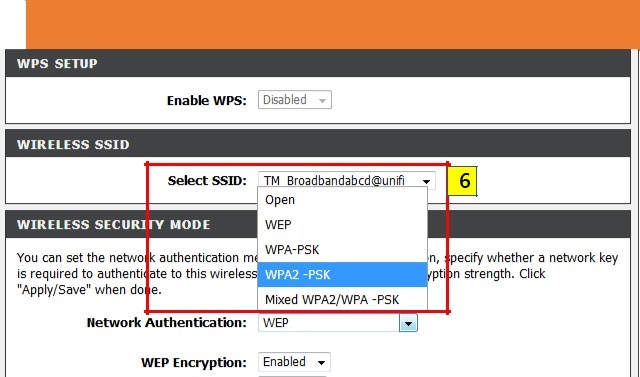
STEP 6: For WPS Wireless security mode, select “WPA2-PSK” to set as the Network Authentication.

- Please take note that the Network Authentication both of WEP and WPA-PSK doesn’t support WPS function.

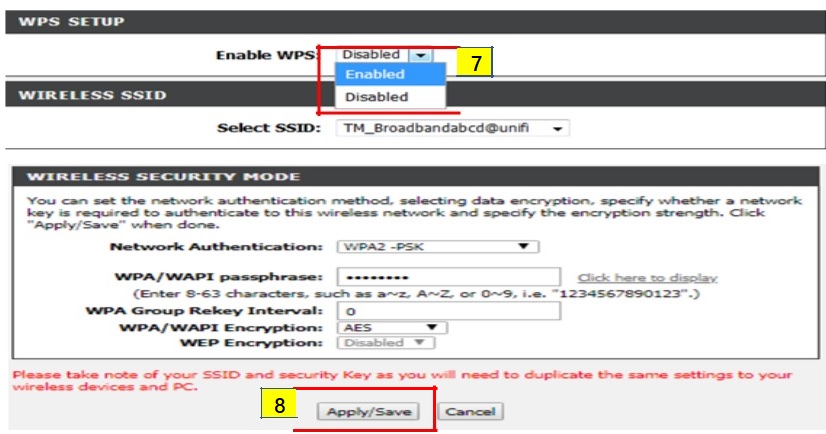
STEP 7: Choose the “Enabled WPS” to turn on the WPS setup.
STEP 8: Click the “Apply” to save the configuration.

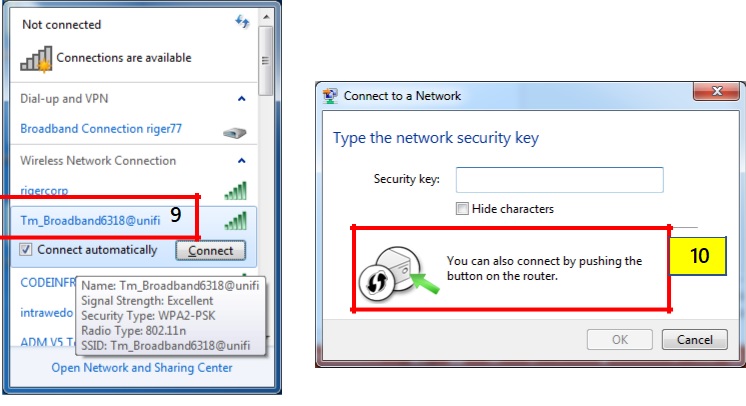
STEP 9: Go to Wireless Network Connection and “Select” the related “SSID Name” which already configure with WPS function.
STEP 10: A pop up message will show on your PC prompting to fill in password. Push the “WPS button” at the rear of the modem. After that the Wi-Fi connection will be establish. User can browse the internet.