CARA-CARA BUAT PORT FORWARDING( MODEM RIGER ADM-206 ADSL)
GAMBAR 1 : MODEM RIGER ADM-206
CARA-CARA BUAT PORT FORWARDING( MODEM RIGER ADM-206 ADSL)
GAMBAR 1 : MODEM RIGER ADM-206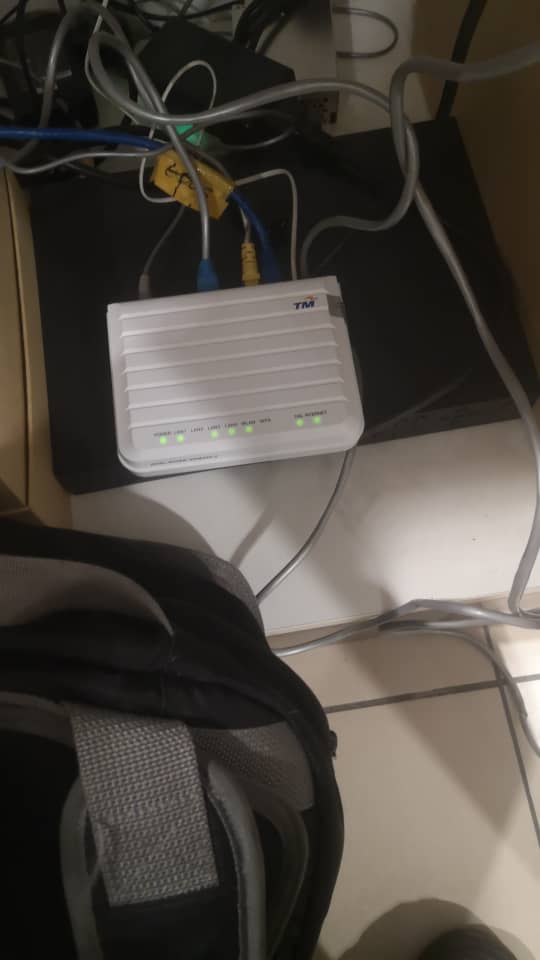
STEP 1: Open your web browser and go to http://192.168.1.1
STEP 2: Enter the username and password (tmadmin/Adm@xxxx)
<Note: XXXX = last 4 digit of Mac Address>.
STEP 3: Click “Login” to log in to the Web page.

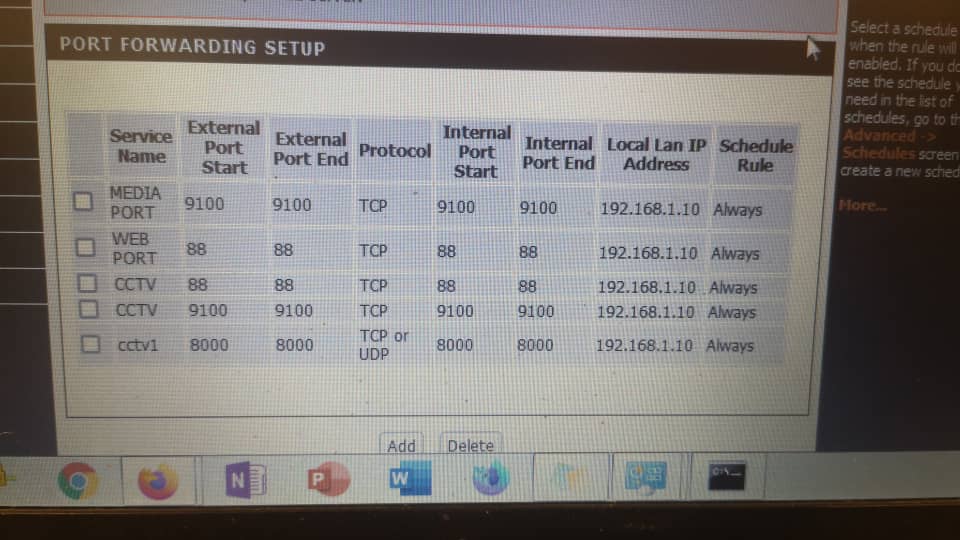
STEP 4:To add new port forwarding service you can go to the “Advanced” and select the “Port Forwarding” to proceed the port forwarding setup.
STEP 5:Click the “Add” button to key in the configuration detail.

STEP 6: Choose the “WAN Connection” type in the modem (in this page we use PPPOE setup). Select the predefined service according to designated port. If custom service is use; we need to define the service.
STEP 7: Select the “schedule” for the port forwarding. Key in the “Local LAN IP Address” of the affected service.
STEP 8: Key in the information related to the service (“External Port Start to End” – “Protocol” – “Internal Port Start to End”).
STEP 9: Click the “Apply” to save the configuration.

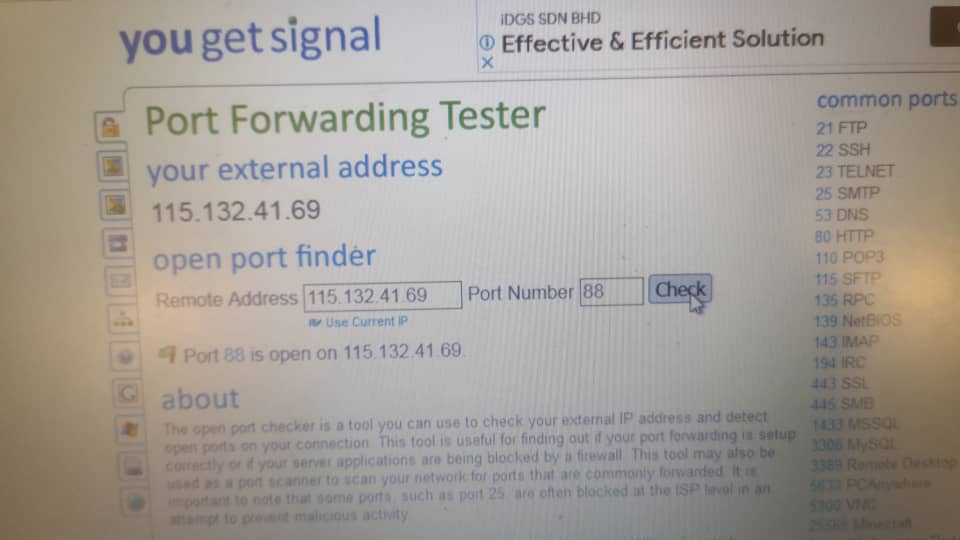
STEP 10: Verify the Port Forwarding Setup. The added port should be working normally.
STEP 1: Open your web browser and go to http://192.168.1.1
STEP 2: Enter the username and password (tmadmin/Adm@xxxx)
<Note: XXXX = last 4 digit of Mac Address>.
STEP 3: Click “Login” to log in to the Web page.
STEP 4: By default WPS is disabled. Go to the “Setup” button. Then select the “Internet Setup” and tick the “Manual Setup” to proceed security setting.

STEP 5: Click the “Security Setting” to configure security features of the Wireless LAN interface.
STEP 6: For WPS Wireless security mode, select “WPA2-PSK” to set as the Network Authentication.


STEP 7: Choose the “Enabled WPS” to turn on the WPS setup.
STEP 8: Click the “Apply” to save the configuration.

STEP 9: Go to Wireless Network Connection and “Select” the related “SSID Name” which already configure with WPS function.
STEP 10: A pop up message will show on your PC prompting to fill in password. Push the “WPS button” at the rear of the modem. After that the Wi-Fi connection will be establish. User can browse the internet.
STEP 1: Open your web browser and go to http://192.168.1.1
STEP 2: Enter the username and password (tmadmin/Adm@xxxx)
<Note: XXXX = last 4 digit of Mac Address>.
STEP 3: Click “Login” to log in to the Web page.
STEP 4: Click on “Setup” and select “Internet Setup”. Then choose “Add “ to configure WAN interface.
STEP 5: Default in Modem is PPPOE mode with “(VPI : 0 / VCI : 35)”
STEP 6: Key in the modem “PPP Username” & “PPP Password “(Provided by your Internet Service Provider).
STEP 7: Tick the “Use static IP Address” for IPV4 and tick “Enable IP
Unnumber”
STEP 8: Key in the “Static IP Address” (Provided by TM) and “Subnet Mask”.


STEP 9: Click “Next” at the bottom of the page.

STEP 10: Last, Click “Apply” to save the configuration.

STEP 11: “WAN Setup” will show the summary of newly added PPPoE setting.

STEP 12: Click the “Status” and select “Device Info” to verify status Internet connection. When DSL is connected, ADM206-2 should be able to get the IP Address for Internet.
ROUTER MODE CONNECTION – DYNAMIC IP
Pastikan modem RIGER ADM 206 berkeadaan baik

STEP 1: Open your web browser and go to http://192.168.1.1
STEP 2: Enter the username and password (tmadmin/Adm@xxxx)
<Note: XXXX = last 4 digit of Mac Address>.
STEP 3: Click “Login” to log in to the Web page.

STEP 4: Click on “Setup” and select “Internet Setup”. Then choose “Add” to configure WAN interface.

STEP 5: Default in Modem ATM PVC Configuration is “(VPI :0 / VCI :35)”

STEP 6: Choose and select connection type as below :-
•Protocol : BRIDGING.
•Encapsulation Mode : LLC/SNAP-BRIDGING.
STEP 7: Click “Next” to save the configuration.

STEP 8: Click “Apply” to save the configuration.

STEP 9: “WAN Setup” will show the summary of newly added Bridge setting.

STEP 10: Click the “Status” and select the “Device Info” to verify Bridge status connection.

STEP 11: Configure modem dialer on PC. Connect a RJ45 LAN cable from LAN Port modem to the LAN Port PC.
STEP 12: Open the dialer. Fill in your account “PPP username” and “PPP password”. Click on “Connect” button to proceed.
ROUTER MODE CONNECTION – DYNAMIC IP
Pastikan modem RIGER ADM 206 berkeadaan baik
STEP 1: Open your web browser and go to http://192.168.1.1
STEP 2: Enter the username and password (tmadmin/Adm@xxxx)
<Note: XXXX = last 4 digit of Mac Address>.
STEP 3: Click “Login” to log in to the Web page.
Follow video youtube dibawah untuk step by step cara config modem RIGER ADM-206: