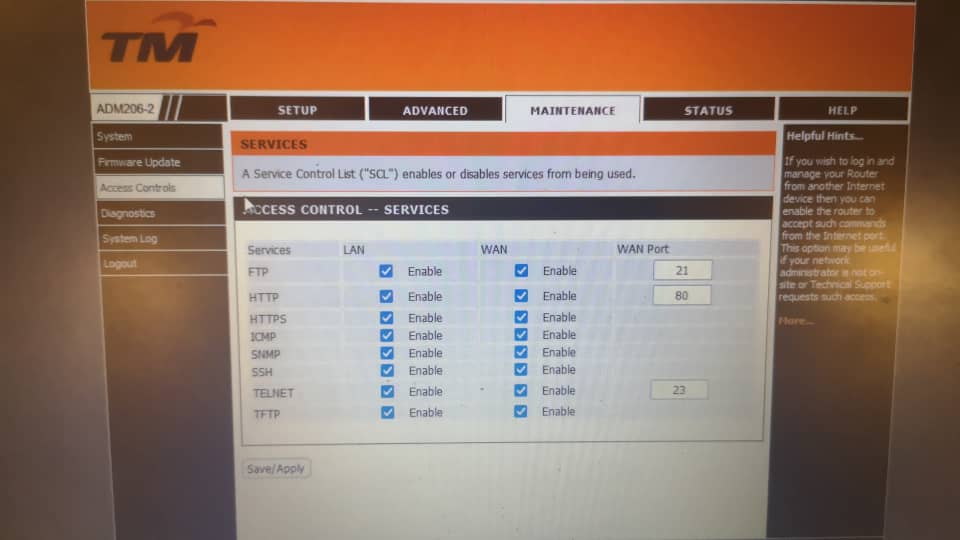
CARA-CARA BUAT PORT FORWARDING( MODEM RIGER ADM-206 ADSL)
GAMBAR 1 : MODEM RIGER ADM-206
CARA-CARA BUAT PORT FORWARDING( MODEM RIGER ADM-206 ADSL)
GAMBAR 1 : MODEM RIGER ADM-206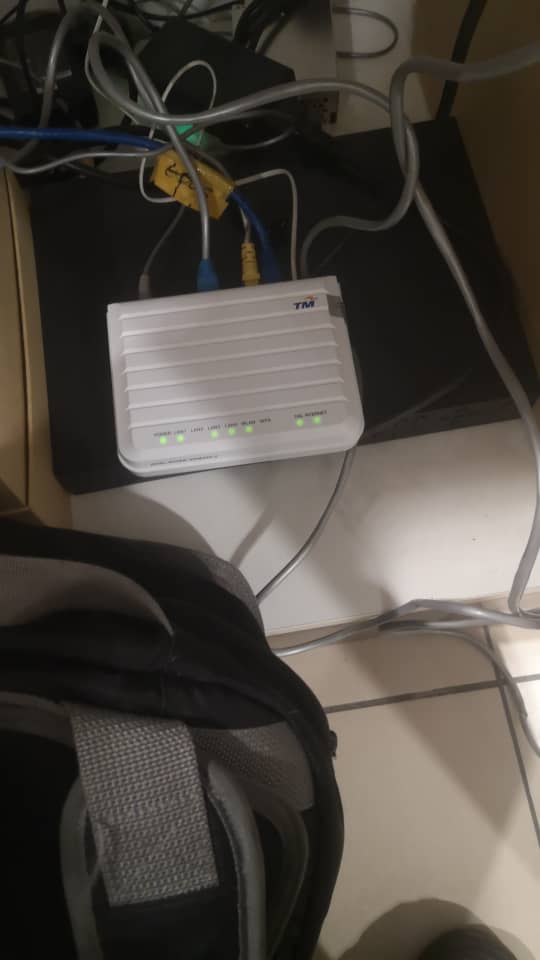
tmwifibhX0X08@XXXXX
DOWNLOAD DRIVER USB RS232 CONVERTER
ARUBA – AP207
bootfile armv7ns.ari
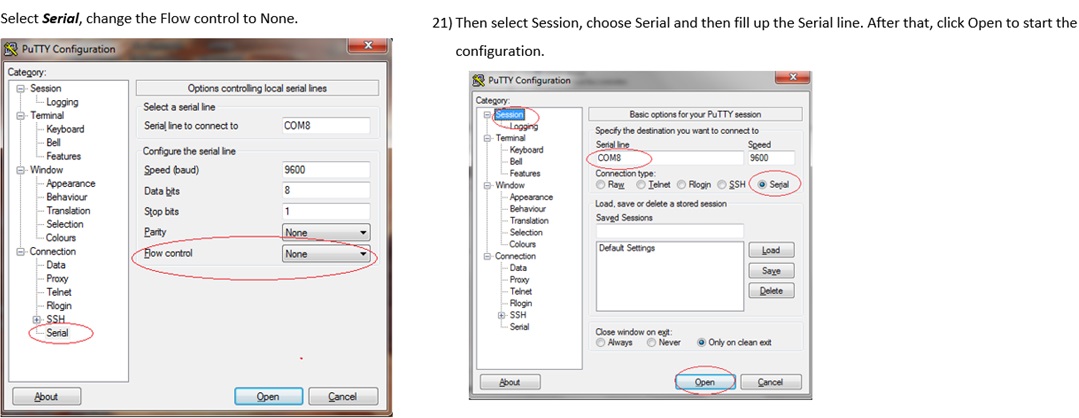
masuk software putty
klik Serial..masukkan COM? Number
Klik serial (kiri) …pada flow control=none
Klik Open
Cepat masuk 1 saat klik Enter ….cepat cepat klik…klik sebelum boot count dari 2 ke 0..bila dah 0..kena buat balik cabut power cable & boh balik. Supaya kluaq prompt apboot> (refer gambar)
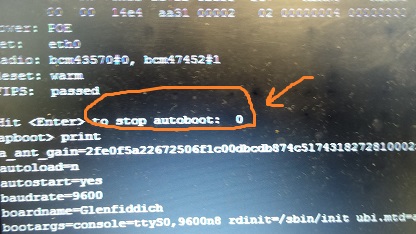
apboot>
Copy & paste script dlm NOTEPAD (rujuk bawah)
Jangan lupa save yer
apboot>saveenv klik Enter
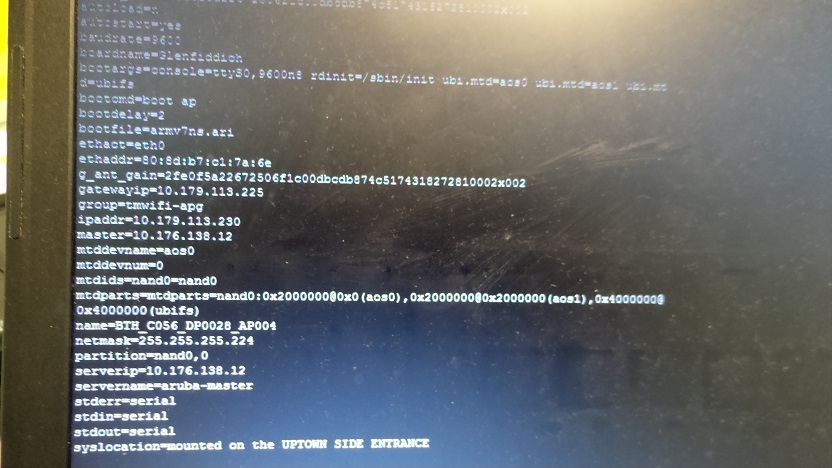
refer balik info config…
klik apboot>print
AP Configuration Template – To Configure AP Details (refer kepada order form/detail TT)..bertanda bold hitam perlu edit ikut detail lokasi pemasangan AP .Copy & Paste script bawah.
set name BTH_C056_DP0028_AP004
set group tmwifi-apg
set master 10.176.138.12
set serverip 10.176.138.12
set ipaddr 10.179.113.230
set gatewayip 10.179.113.225
set netmask 255.255.255.224
set a_ant_gain 2fe0f5a22672506f1c00dbcdb874c5174318272810002x002
set g_ant_gain 2fe0f5a22672506f1c00dbcdb874c5174318272810002x002
set syslocation mounted on the UPTOWN SIDE ENTRANCE
apboot>print
tima kasih
Pastikan router TM Dlink 842 (4 ANTENA) telah install firmware terbaru. VERSION 3.06TM.


ATAU JIKA SUBNET 255.255.255.252 (1 FIX IP ADDRESS SAJA) SETTING SEPERTI INI


LOGIN VIA http://192.168.1.1

• Check the firmware version, which is SR_V1.02 (latest)
Removing VLAN 400 configuration for residential customer
1.Go to Advanced Setup and click on WAN Service

2.Expand the WAN configuration (with arrow), click on VID 400.

3.Click ‘Delete’ to remove configuration of VLAN 400.

•Insert PPPoE account
1.Go to Advanced Setup and click on WAN Service

2.Confirm the connection name with ‘1_INTERNET_R_VID_500’

3.Fill in the PPPoE username and PPPoE password

4.Add binding of VLAN 500 to LAN 3.

5.Lastly, click ‘Apply’ to activate the internet service.

6.Go to Status and click on ‘WAN’ to check the WAN connection status of IPv4 and IPv6.

WIFI CONFIGURATION (2.4 GHZ)
1.Go to Basic Configuration and WLAN, click on Basic Config 2.4GHz

2.Make sure WLAN 2.4GHz and SSID are enabled.
3.The SSID name can be set manually, click ‘Apply’ after changed.

4.Go to Security Setting 2.4GHz, WiFi password/WPA Preshare key can be defined according to customer preference.
5.Click ‘Apply’ to activate the setting.

WIFI CONFIGURATION (5 GHZ)
1.Go to Basic Configuration and WLAN, click on Basic Config 5GHz

2.Make sure WLAN 5GHz and SSID are enabled.
3.The SSID name can be set manually, click ‘Apply’ after changing the SSID.

4.Go to Security Setting 5GHz, WiFi password/WPA Preshare key can be defined according to customer preference.
5.Click ‘Apply’ to activate the setting.

END
Follow video youtube dibawah:
Follow video youtube dibawah: