Hanya version SR_V1.01 perlu update
Jika version SR_V1.02 dan ke atas tidak perlu upgrade firmware.
IP address 192.168.1.1
username : fiberhome
password : fiberhome
link untuk download firmware
Follow video youtube dibawah:
Hanya version SR_V1.01 perlu update
Jika version SR_V1.02 dan ke atas tidak perlu upgrade firmware.
IP address 192.168.1.1
username : fiberhome
password : fiberhome
link untuk download firmware
Follow video youtube dibawah:
Follow video youtube dibawah:
Follow video youtube dibawah:
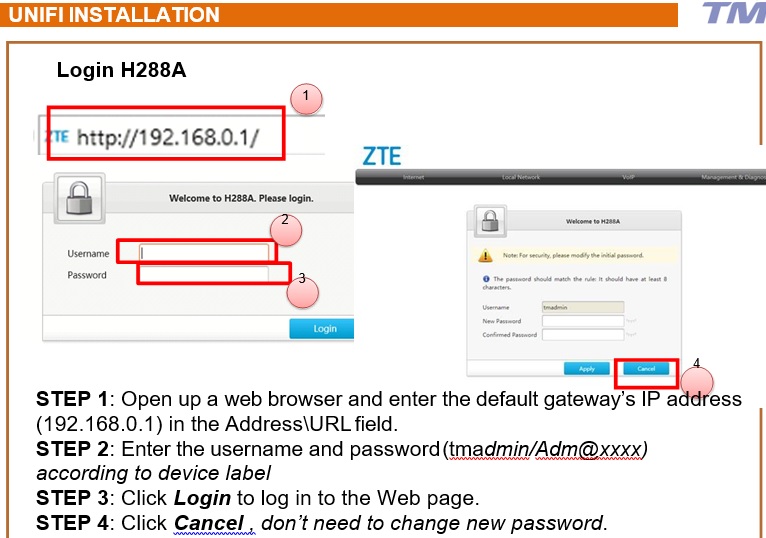
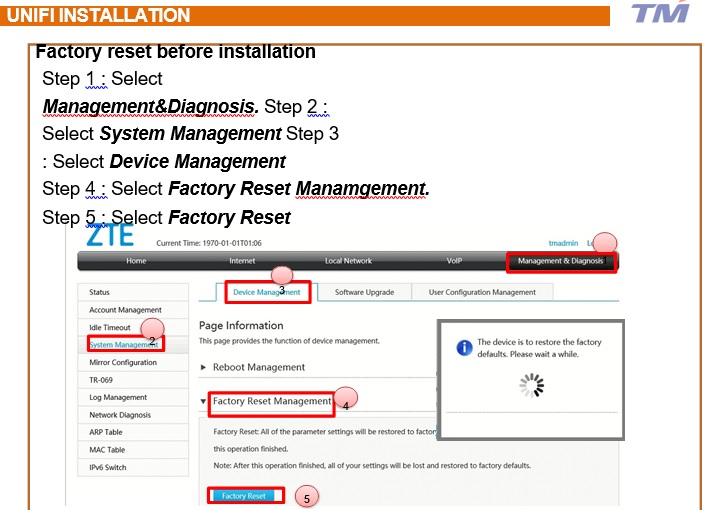
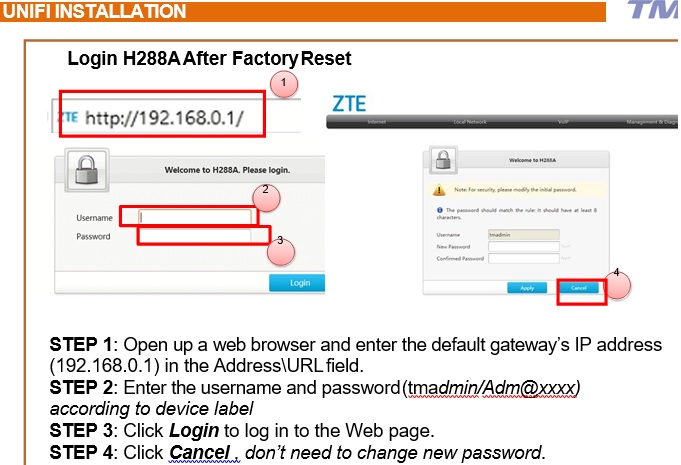
Login http://192.168.0.1
LOGIN VIA http://192.168.0.1
KLIK SINI UTK DEMO CARA-CARA CONFIG DLINK 825M
Setting up of DIR-825M Internet – Dynamic IP (manual) pastikan latest firmware ver 1.1.8
Open up a web browser and enter the default gateway’s IP address (192.168.0.1)
in the Address\URL field
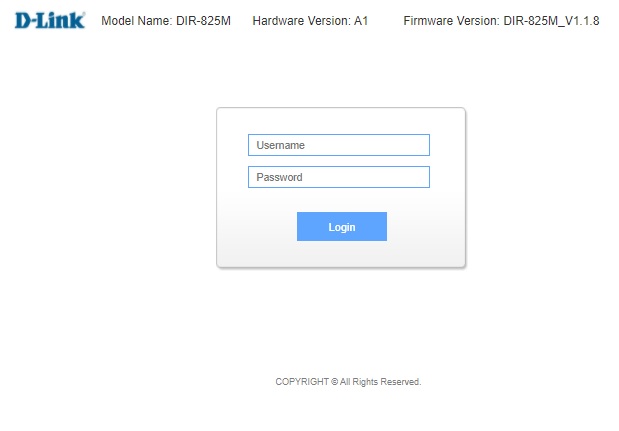
http://dlinkrouter.local./ in the Address\URL field.
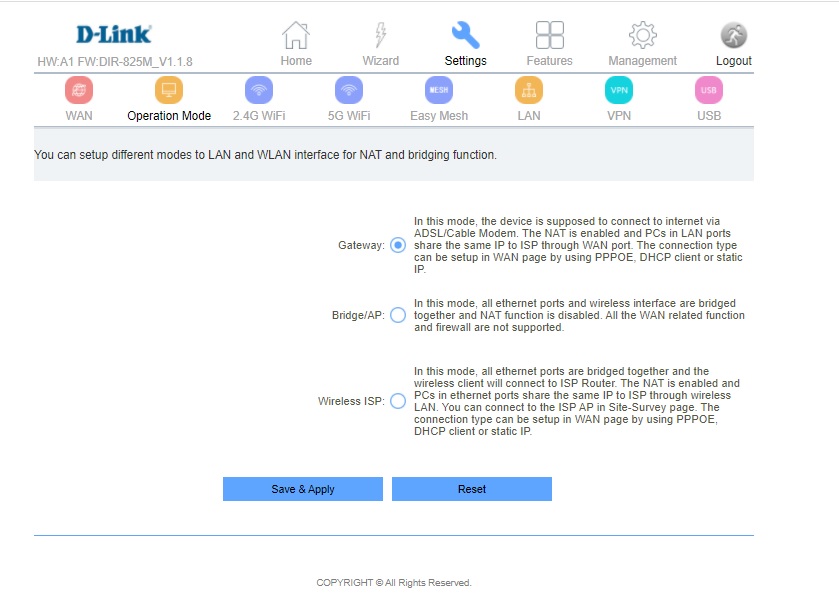
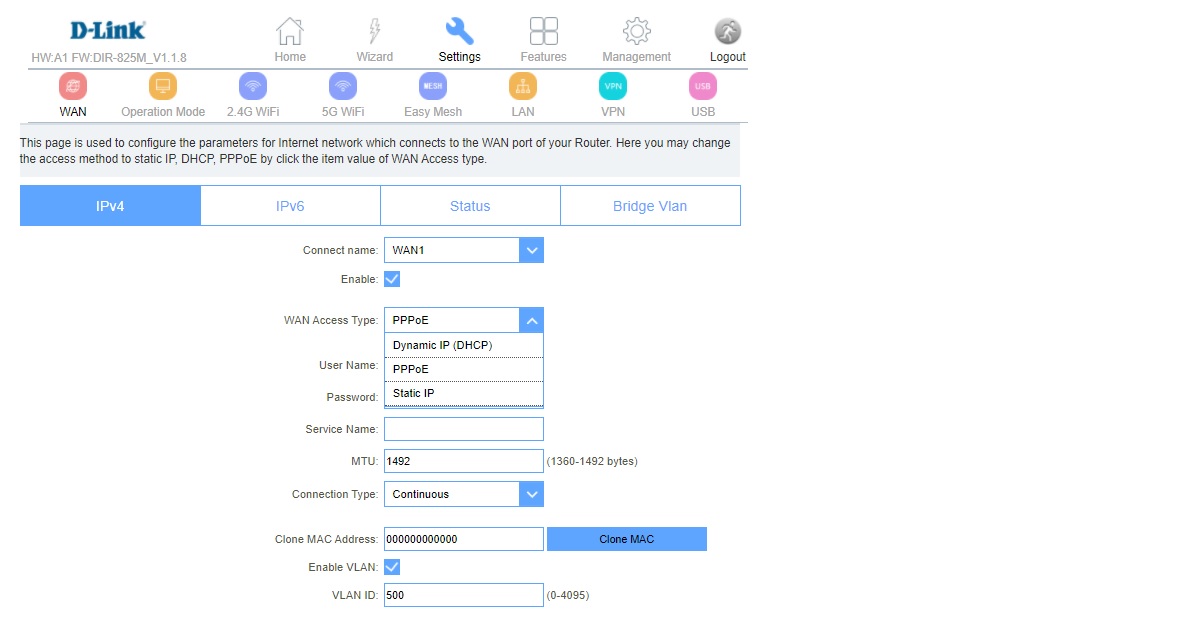
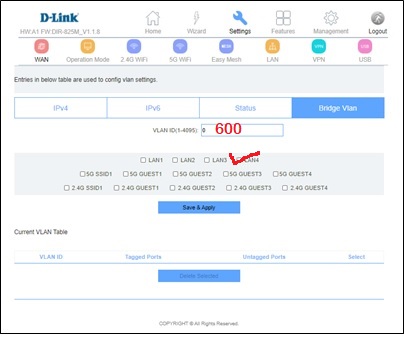
IPTV VLAN Setup
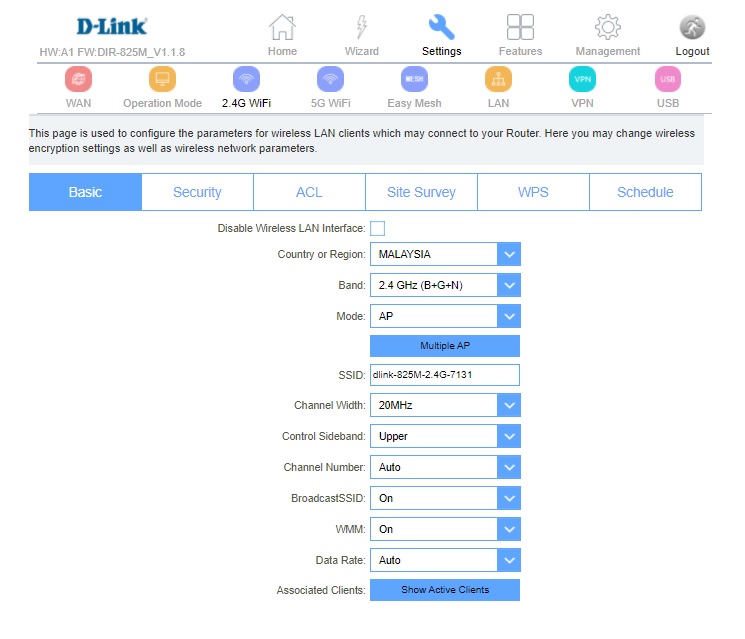
Wireless Setup
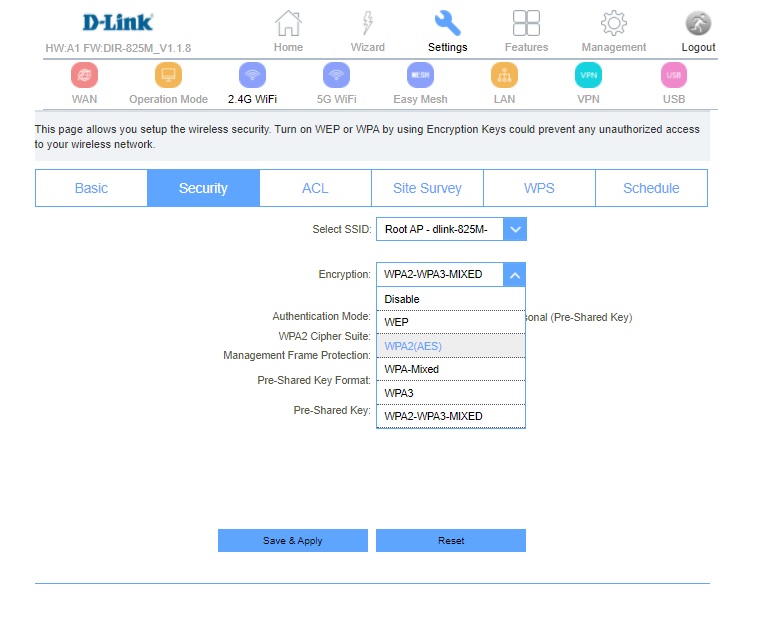
10.Pre-Shared Key Format : Passphrase
12. Click Save & Apply to save configure.
DNS Setup
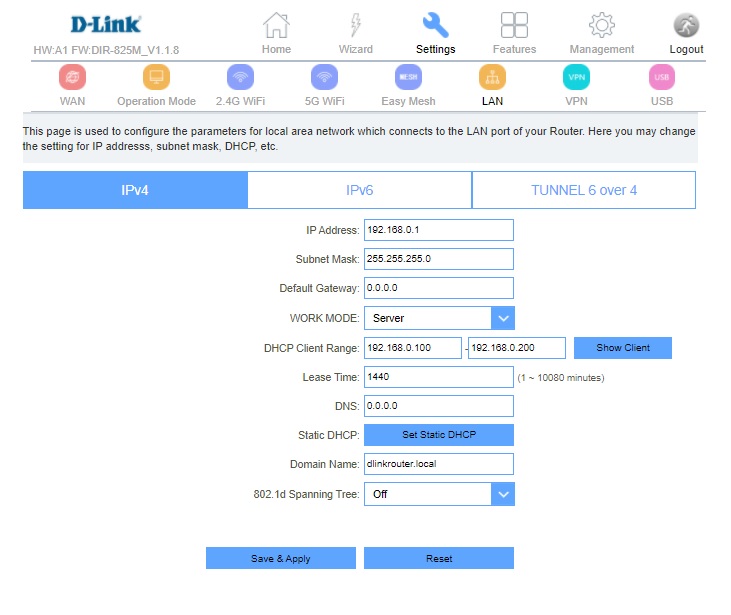
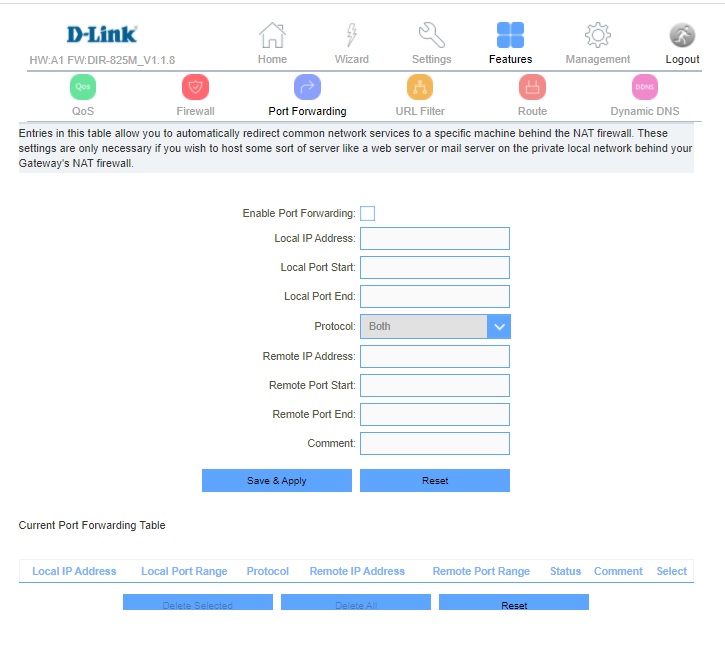
PORT FORWARDING
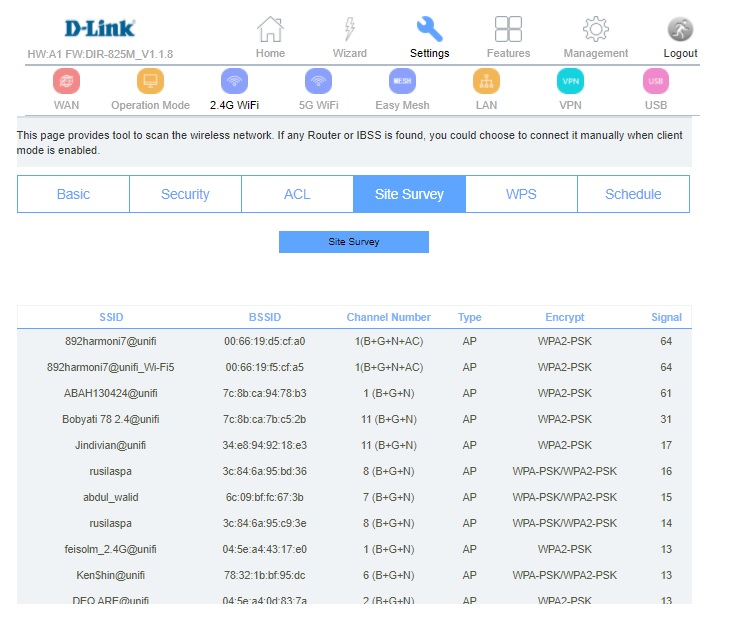
SITE SURVEY (Wifi Analyzer)
This page provides tool to scan the wireless network. If any Router or IBSS is found, you could choose to connect it manually when client mode is enabled.
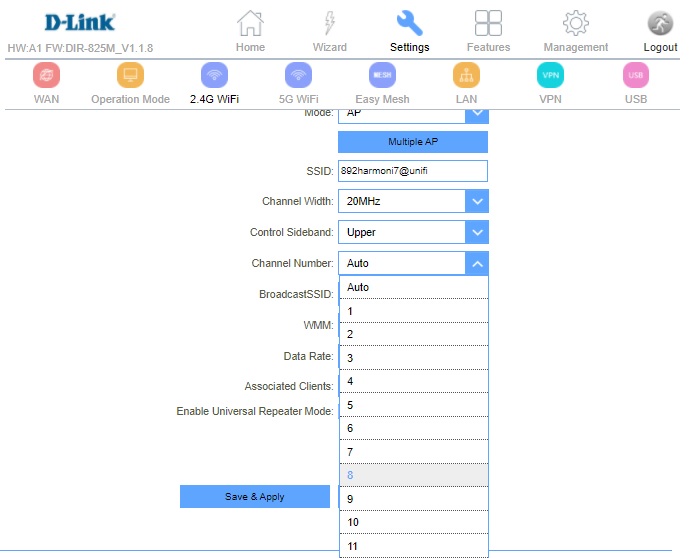
link untuk download firmware DLINK DIR-825 (ver 1.1.8 security update)
Follow video youtube dibawah:
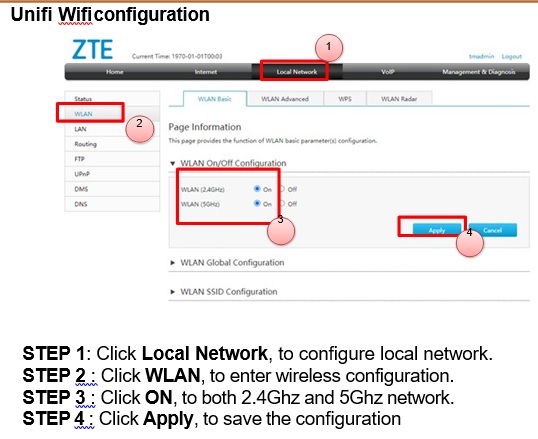
STEP 1: Open your web browser and go to http://192.168.1.1
STEP 2: Enter the username and password (tmadmin/Adm@xxxx)
<Note: XXXX = last 4 digit of Mac Address>.
STEP 3: Click “Login” to log in to the Web page.
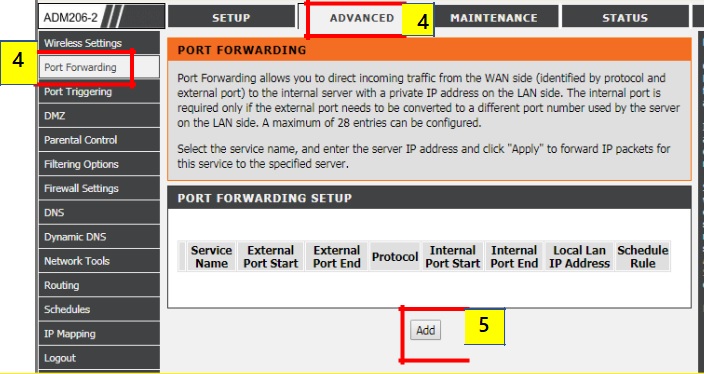
STEP 4:To add new port forwarding service you can go to the “Advanced” and select the “Port Forwarding” to proceed the port forwarding setup.
STEP 5:Click the “Add” button to key in the configuration detail.
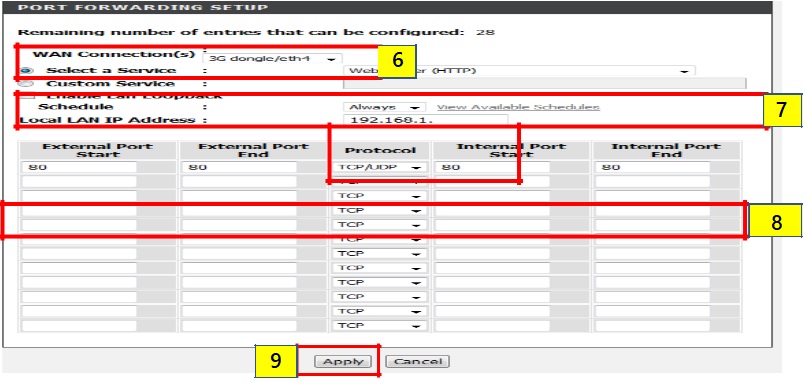
STEP 6: Choose the “WAN Connection” type in the modem (in this page we use PPPOE setup). Select the predefined service according to designated port. If custom service is use; we need to define the service.
STEP 7: Select the “schedule” for the port forwarding. Key in the “Local LAN IP Address” of the affected service.
STEP 8: Key in the information related to the service (“External Port Start to End” – “Protocol” – “Internal Port Start to End”).
STEP 9: Click the “Apply” to save the configuration.
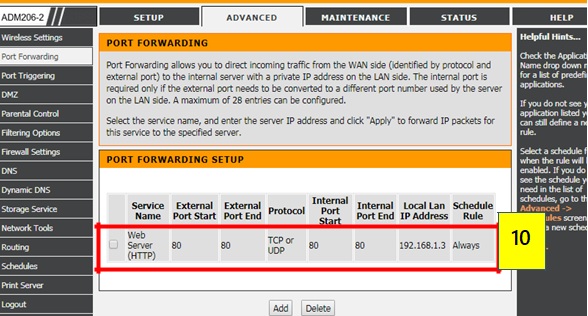
STEP 10: Verify the Port Forwarding Setup. The added port should be working normally.
STEP 1: Open your web browser and go to http://192.168.1.1
STEP 2: Enter the username and password (tmadmin/Adm@xxxx)
<Note: XXXX = last 4 digit of Mac Address>.
STEP 3: Click “Login” to log in to the Web page.
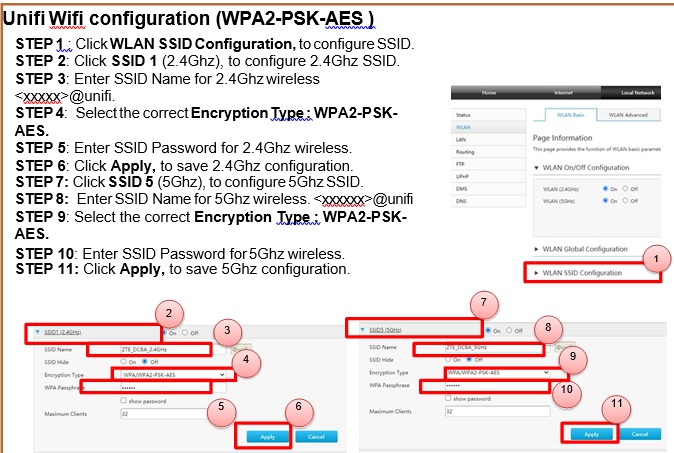
STEP 4: By default WPS is disabled. Go to the “Setup” button. Then select the “Internet Setup” and tick the “Manual Setup” to proceed security setting.
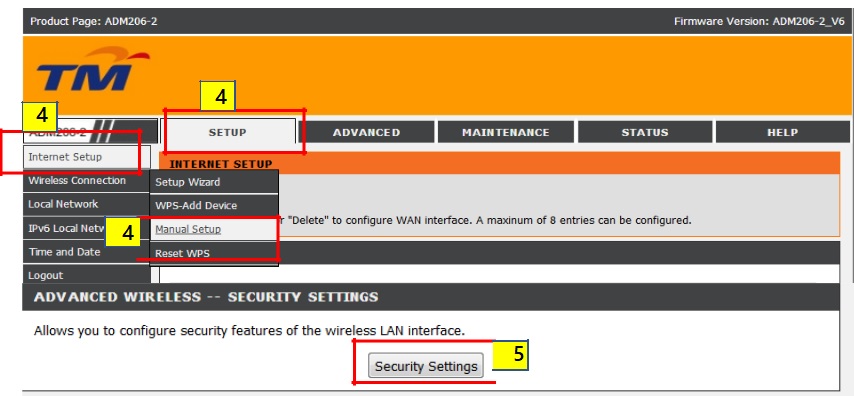
STEP 5: Click the “Security Setting” to configure security features of the Wireless LAN interface.
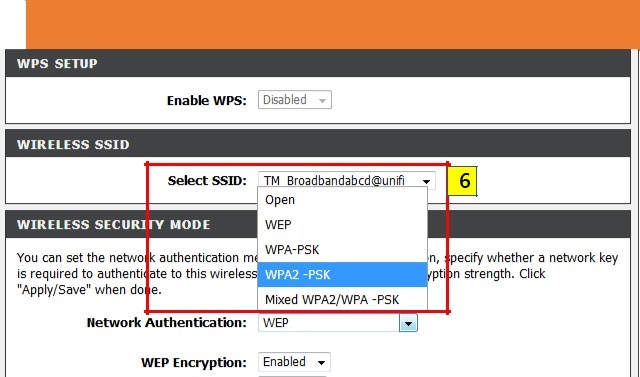
STEP 6: For WPS Wireless security mode, select “WPA2-PSK” to set as the Network Authentication.
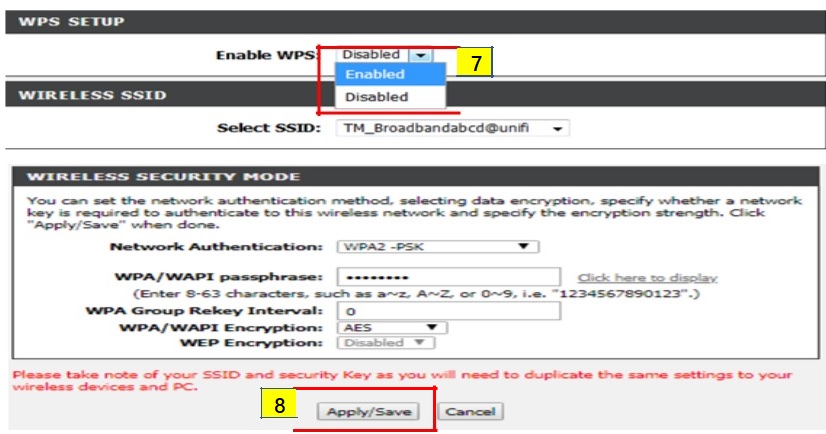
STEP 7: Choose the “Enabled WPS” to turn on the WPS setup.
STEP 8: Click the “Apply” to save the configuration.
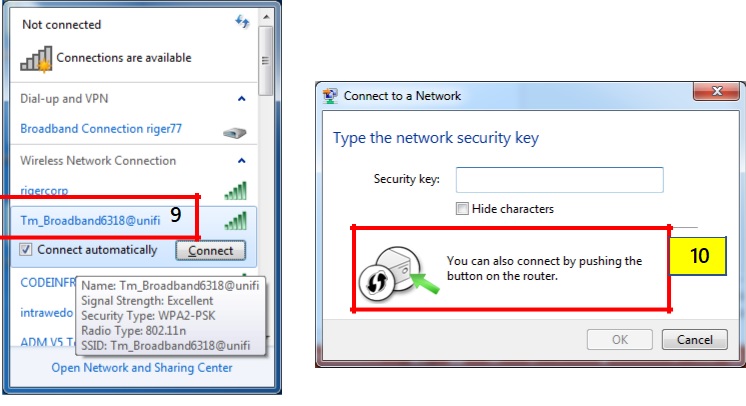
STEP 9: Go to Wireless Network Connection and “Select” the related “SSID Name” which already configure with WPS function.
STEP 10: A pop up message will show on your PC prompting to fill in password. Push the “WPS button” at the rear of the modem. After that the Wi-Fi connection will be establish. User can browse the internet.